Buy Online, Pick up In-store -
Save Time & Money with Advance Auto Parts
 |
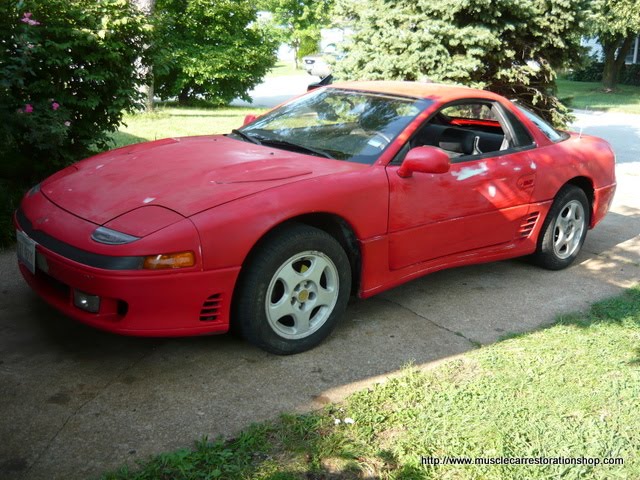
| The ole Classic muscle car restorer is rebuilding a little Mitsubishi 3000 GT. Have it running great now and seems to stop well. Air works,cruise control and sport suspension. Getting it ready for paint , front seat covers and a new CD player and this Japanese Ferrari is on Craigslist and up for sale. This car is a low mileage automatic and these are getting hard to find. These and the Dodge Stealths are very collectible and a blast to drive |
 |
| Doing a little car paint and restoration here on my 3000 GT. Wet sanded down for the first time. A few places to smooth out and a quick paint job. So far has ran just fine. Didn't even take my tools on the first run. Not bad for not even having a book on this guy and my first one. Heck my buddies up at the corvette and tech shops up town don't even want to mess with these over head double cams but i've been building these overhead cams since my 1979 VW Rabbit |
 |
| Lining up the cams on the timing marks Two dots in front on arrows on head. On back side single mark on back of cam in middle center lined up with valve cover mark. double mark on front intake lined up with double mark on valve cover. Be careful. Cams will jump. Do not bend the valves. Number 1 piston is all the way up. |
 |
| Have rear engine mount on with mount to frame hanging at firewall side ready to bolt to the frame with 4 bolts. No front mount on engine and drivers side engine mount to frame off. Automatic slid right in without front pullies though.Get a couple of tranny bolts started and the the firewall mount to frame 4 bolts. front engine mount then drivers side mount. Your engine is now back in. Me and my brother figured out about five ways not to put it in the first time. I Slipped this in by myself the first time second time around. |
 |
| Now if I could put web pages together like I can put these engine puzzles together I might actually sell something. Maybe build a sports car for one of these so called guuuuuRoooos for a little guidance. Want to build them cauz I want to not because I have to. Now this is not a little fart can car. This is a nice classic sports touring fast car. There is a couple of kids down the street with the fart cars. Think I'll pull in front of their house and smoke the tires just for shits and grins. Cool that they're into cars though. |
 |
| This is what takes so dang long putting these cams back together. Everything laied out and put back the way they came out. Do not mix up your caps and roller rockers. Put a little white lithium crease on the parts for initial start up. Be carefull and do not force. Remember the number 1 and I believe number 4 piston are at top dead center when the crank is set on TDC mark on oil pump.Rear cams should stay in place. Front will jump on ya.Think I held the front two in place with vise grips after lining up with marks on valve cover, then removing vale cover. Helps to clip timing belt on with simple paper clips to hold in place. Once you have the cams in place and crank on mark, bake crank just enough to grab the next tooth back on belt then take the tension out of the belt on the rear side. Now your ready to trigger the tensior. You will have to put the tensior on last. Outside bolt on first the take a screw driver up and pry it forward a bit to put tension on the belt and get the front bolt in. Be carefull and make sure you have all your marks lined up as when you set the tensior thats it. Heard you can slowly retract the tensior, Say on your vise but they do not recomend it. So get it right the first time . Setting the timing marks arn't easy on the garage floor and the first time I did it I had to reset it in the car. Car was running right just the crank was pounding. Soooooooo lets do it one more time!!!!! |
 |
| Cams on mark ready for timing belt.Always helps to paint the marks on the cam wheel white and the same on head and valve covers. The crank mark is a line on the oil pump at about 2 oclock . Line up with little slot on timming crank pully. Inthis picture I had to take the tensior off to get the timing belt on and then start the rear bolt on tensior. There is a little lip on the oil pump you can use to hold the tensior in place to tighten up in the correct position. Don't get to crazy tightening the tensioner on. Remember make sure yo are right on the marks before pulling the pin. After setting crank the engine over carefully and if you feel a valve binding on the top of a piston ........ STOP and recheck your marks. Like I said ya might be able to squeeze the tensior back slowly on a vice but not sure. Parts kid said he did and ran for 30 thousand. And my damn tensior cost me $130.00 bucks. Heck me and my son Lance dragged the whole engine home for $100.00 bucks. Was after the crank and a rod. |
 |
| Heck even had an engine stand in the shed but just built this on the garage floor. Didn't even have a book and the first one I ever messed with. Got the Head torque settings from Aoto Zone up the street. Kinda looks like a big 426 Hemi with thoes big heads. |
 |
| Got the engine dropped in place that day . Got everything hooked up the next day. There's the boss Jackson. My ole dog I've had for 14 years. Great garage dog. Old , stubborn , real stubborn now and just a mellow ole buddy. Ole Jackson needs a watch dog now days to wake him up to bark and act like a watch dog but heck Jackson just doesn't give a dang. |
 |
| Had to pull the axel out to replace a CV boot and take the hub up to Tims Corvette shop to press the wheel bearings out on the drivers side to pound in three wheel studs, This car only has 87,780 miles . |